
Flip Physics
Flip Physics Reflex Challenge: Controls, Regrabs, and Timing
Flip Physics is a physics-driven gymnastics challenge where the character hangs from bars, gathers speed, launches into the air, and searches for the next clean regrab. The game is built around fine timing. The same button can feel early or late depending on the swing direction, the body position, and the bar you are trying to reach. On Nate Hand Gesture, the best way to approach the game is as a reflex training loop: observe the motion, select a small correction, replay the result, and repeat.
1. Read the screen before pressing keys
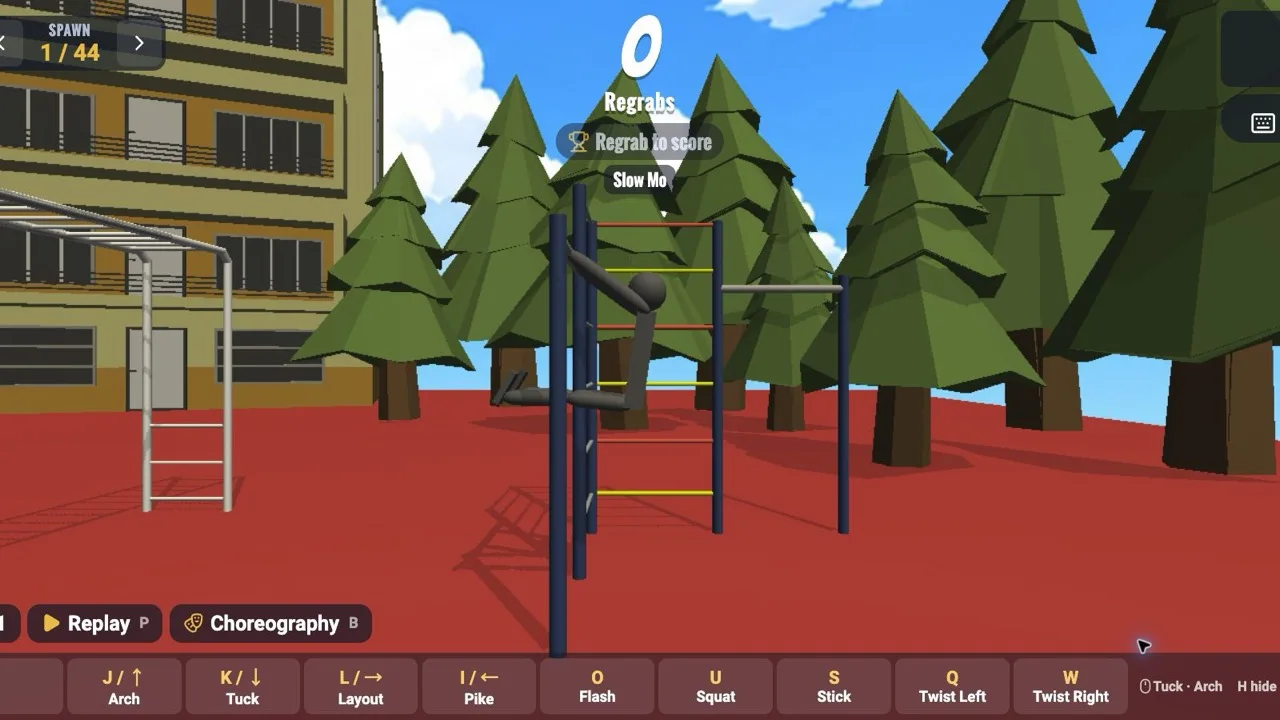
A Flip Physics attempt contains several layers of information. The upper interface can show the spawn count and regrabs. The lower controls list the body positions. The scene provides fixed landmarks such as buildings, trees, support posts, ladders, and horizontal bars. During a run, the display can also show Rec, Replay, Choreography, Regrab to score, and Slow Mo. These labels are useful because they tell you which phase of the attempt is active.
The character is a ragdoll, so its silhouette can look chaotic during a missed launch. Focus on three points in order: the direction of travel, the position of the hands, and the bar you want to reach. The feet and torso help you understand rotation, yet the hands decide whether the next connection succeeds. A player who watches only the center of the body will often react too late.
Before starting a difficult stage, let the scene settle and identify the nearest usable bar. Memorize its color, height, or relationship to the support posts. This simple scan reduces the amount of visual searching during the flight.
2. The control map
Space is Let Go, the action that ends the attached swing and begins the launch. J or Up Arrow is Arch. K or Down Arrow is Tuck. L or Right Arrow is Layout. I or Left Arrow is Pike. O is Flash, U is Squat, and S is Stick. Q and W are Twist Left and Twist Right. R resets the current attempt, H hides the controls, and M opens the keyboard overlay. The embedded game also responds to mouse-based swing input: holding the left mouse button influences the swing and releasing it sends the character into the air.
The controls are easier to learn as a small vocabulary. Arch is the starting swing command in the tutorial. Let Go is the launch command. Tuck, Layout, and Pike are shape changes. Twist Left and Twist Right are directional corrections. Stick is a finishing idea to test when you are approaching a stable landing or catch. Flash and Squat can be explored after the main rhythm is familiar.
Do not treat the full keyboard panel as a checklist. Each input should answer a question. Does Tuck increase the rotation enough? Does Layout make the body open too soon? Does a twist move the hands toward the bar? If the answer is unclear, repeat the same launch with one input removed. This gives you a comparison you can actually use.
3. Follow the seven-lesson learning path
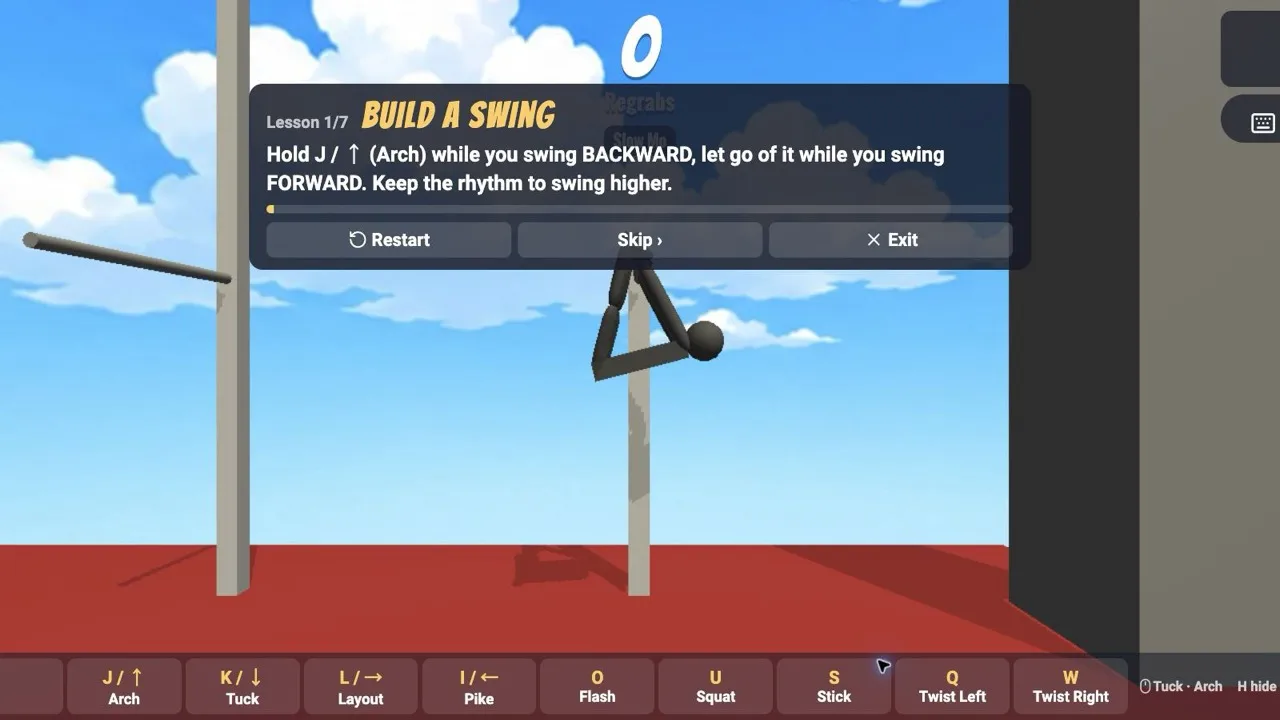
The tutorial opens with Lesson 1 of 7, Build a Swing. Its instruction is precise: hold J or Up while swinging backward, release it while swinging forward, and keep the rhythm to swing higher. This is the core of the game. A strong launch starts with a rhythmic transfer of movement rather than a frantic key press.
Lesson 2 is Let Go. It teaches the player to swing upward and press Space while the body rises toward the front. This connects the swing phase to the flight phase. The first two lessons should be practiced until you can recognize the correct release from the animation. A stopwatch is unnecessary; the bar and the body already provide the timing reference.
The remaining lessons can be treated as a progression from launch to control and recovery. When a later lesson introduces a move, test it in isolation. Restart the lesson after one uncertain attempt, then repeat it with the same setup. Skipping the explanation may save seconds, yet replaying a short lesson often saves many failed full runs.
The tutorial overlay includes Restart, Skip, and Exit. Restart is useful when the timing has drifted. Skip is appropriate after the idea is already familiar. Exit returns you to the main game selection. This makes the tutorial a practical training room rather than a one-time introduction.
4. Swing timing and the release window
A swing has a backward phase, a turning point, and a forward phase. Hold Arch through the backward movement. As the body changes direction, prepare to release. The best window is tied to the forward rise described by the tutorial. Release too soon and the character may leave with insufficient height. Release too late and the useful part of the arc is gone.
Use the first few tries to locate the window instead of demanding a regrab. Watch whether the launch rises in front of the bar or falls back toward the support. If the launch is too vertical, change the release timing before changing the body shape. If it is too flat, build more rhythm and delay the release until the forward motion is clearer.
Mouse and keyboard can create different habits. A mouse hold makes the swing feel continuous, while the keyboard gives a clear Arch input. Pick one method for a practice block so that your timing reference remains stable. Switching methods after every miss hides the cause of the miss.
5. Rotation and body shape
After Space begins the flight, use the body controls to manage rotation. Tuck is a natural first experiment because it changes the shape into a tighter position. A tighter shape can make the motion feel quicker, so apply it briefly and observe the hands. Layout and Arch open the body, which can help you compare a fast rotation with a longer, more extended flight. Pike creates another distinct silhouette for testing.
Twist Left and Twist Right should be treated as directional tools. If the hands pass to one side of the target, a directional twist may help, yet it can also make a stable setup harder to read. Apply it only after the launch angle is repeatable. Flash and Squat are best kept for exploration sessions where the goal is to discover how the game responds.
The correct body shape depends on the target bar. A move that reaches one bar can miss another because the distance, height, and starting momentum are different. Record the target rather than memorizing a universal button sequence. The visual relationship between hands and bar is the dependable signal.
6. Regrabs, records, and replay
The game makes regrabs visible through its counter and the Regrab to score prompt. A catch is easier when you aim the hands toward the bar while the rotation is slowing or already aligned. If the character reaches the bar with the torso first, the body shape is probably too open or the launch is misaligned. If the hands pass above it, reduce the launch height or change the timing of the release.
Replay is valuable even when the attempt ends quickly. Watch the first moment at which the setup diverges. Many players examine the final miss and overlook the earlier release that created it. Use the record timer to compare two attempts with similar starts. The shorter run can still be better practice if it contains a cleaner release.
Choreography gives the session a broader structure. Instead of chasing one regrab, build a short sequence: swing, release, one shape change, and a catch attempt. Slow Mo can reveal the exact frame where the hands approach the bar. Review in slow motion, choose one adjustment, return to normal speed, and test it.
7. Bars and Tumbling are different drills
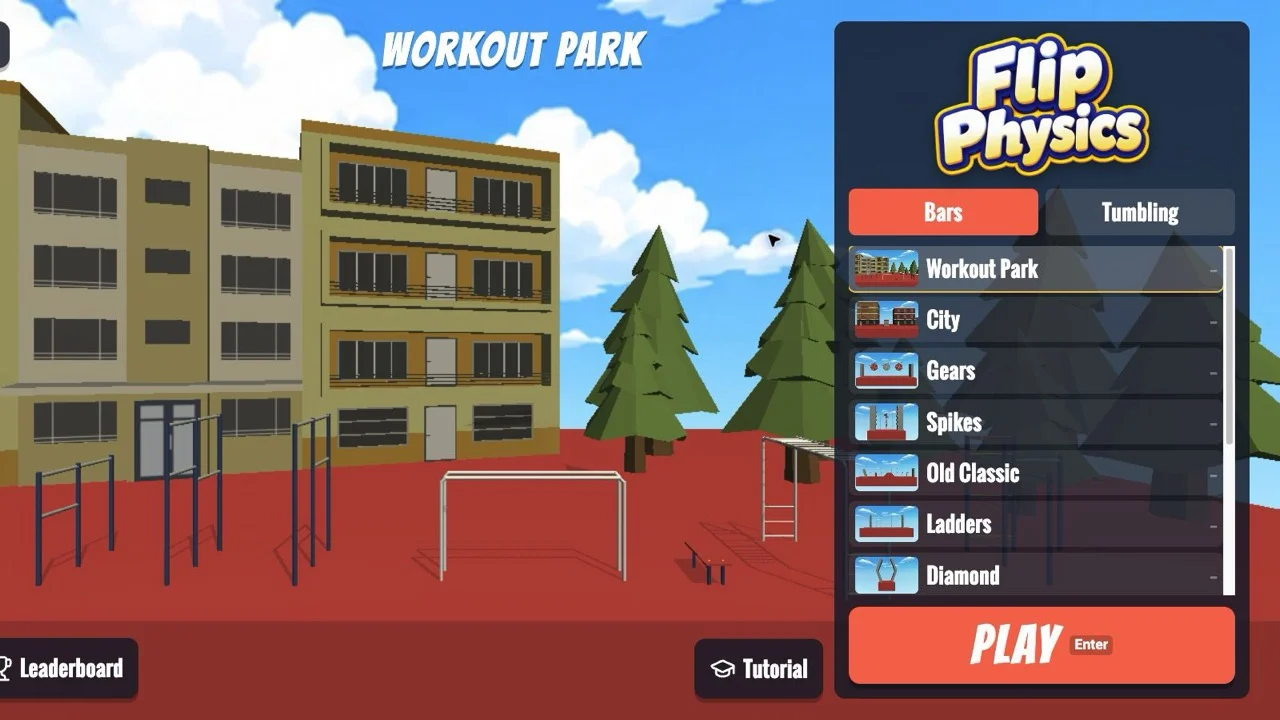
The main menu separates Bars and Tumbling. Bars emphasizes the relationship between a hanging swing and a regrab. It is the right place to learn momentum, release windows, and target selection. The menu contains environments such as Workout Park, City, Gears, Spikes, Old Classic, Ladders, Diamond, New Classic, Trampoline, The W, Indoors, and Classic. Each stage changes the visual context and the arrangement you need to read.
Tumbling is suited to flight experiments. Use it to compare Tuck, Layout, Pike, Arch, and twist inputs without making the first bar your only focus. Switch back to Bars when you want to verify whether an aerial move can lead to a useful catch. This two-drill approach prevents confusion between a rotation problem and a swing problem.
8. A precision routine for Nate Hand Gesture
First, run three attempts with no body change after release. Learn the launch line. Second, repeat the same setup and add only Tuck. Third, try Layout or Pike and compare how long the body stays extended. Fourth, practice one directional twist toward a visible bar. Fifth, use Slow Mo on the best and worst attempts.
Write down a short result after each block: early, late, low, high, left, right, or aligned. These labels are enough. When the same error appears three times, change the phase that causes it. A low launch calls for swing or release work. A missed hand position calls for body-shape work. A lost rhythm calls for returning to Lesson 1.
End the session with a clean fundamentals attempt. Hold Arch backward, release on the forward rise, and aim for one regrab. This gives you a stable reference for the next session and prevents advanced experiments from replacing the basic timing.
9. Browser controls and responsive play
The iframe needs a current browser with JavaScript enabled. The game is easiest to read on a desktop display because the bars, support posts, and keyboard overlay have more room. Click inside the game if keyboard input does not register. Keep the page focused while switching between the game and a guide.
A phone or tablet can be useful for a short test, especially with mouse-style touch input, although a physical keyboard gives cleaner access to the full set of controls. Landscape orientation helps keep the target bar visible. If the game feels delayed, wait for the embedded scene to finish loading, close heavy tabs, and test one input at a time before changing browsers.
Frequently asked questions
What is the goal in Flip Physics?
The core goal is to use swing momentum, launch into the air, control the ragdoll, and regrab bars. The interface also tracks regrabs and shows a regrab scoring prompt.
Which key launches the gymnast?
Space is the Let Go command. The tutorial describes pressing it while the body rises toward the front of the swing.
Why should I learn Arch first?
Arch is the first swing input in the tutorial. Holding it during the backward motion and releasing it during the forward motion creates a repeatable starting rhythm.
How do I know whether to use Tuck or Layout?
Use them as comparison tools. Test one shape on the same launch and watch how the rotation and hand position change. The correct choice depends on the target bar and current momentum.
What is the best way to review a failed run?
Use Replay or Slow Mo and inspect the first divergence from the intended path. Decide whether the error came from the swing, the release, or the body position, then change one variable.
Is the game limited to one environment?
The Bars menu lists multiple environments, including Workout Park, City, Gears, Spikes, Old Classic, Ladders, Diamond, New Classic, Trampoline, The W, Indoors, and Classic.
Final takeaway
Flip Physics becomes manageable when every attempt has a narrow purpose. Train the backward-to-forward Arch rhythm, release on the forward rise, use the hands as the target signal, and review the first mistake through Replay or Slow Mo. The game supports both fast reflex sessions and careful control practice, so steady comparisons produce better results than random combinations of keys.